Email Template
Quick Guide: Change Email Template in Quickbooks
Fancy spicing up your QuickBooks emails? Find out how to effortlessly customize email templates with finesse and add a personal touch.
So, you’ve landed in the charming realm of QuickBooks, all set to take on the challenge of modifying email templates.
Let me tell you, it's not exactly rocket science, but it does require a bit of finesse. If you're wondering how to give your emails that extra oomph or a personalized touch, stick around.
We've got some nifty tips to help you navigate the maze of email template customization in QuickBooks.
Key Takeaways
- QuickBooks allows users to customize email templates for different transaction types, allowing for tailored communication with customers and vendors.
- Users can personalize sender information, including the sender's name, email address, and other relevant details, to create a professional appearance.
- Auto-reply email templates can be set up to streamline communication and promptly acknowledge incoming messages, improving efficiency.
- QuickBooks provides email encryption as an essential feature to protect sensitive financial information and ensure secure communication. Users can easily attach documents to email templates for specific transaction types.
Understanding Email Templates in QuickBooks
Understanding email templates in QuickBooks allows us to tailor our communication with customers and vendors to better suit our business needs.
In QuickBooks, we can easily customize email templates by following a few simple steps. To begin, we need to sign in as an admin or with permission to edit company preferences. Once we've the necessary permissions, we can navigate to the Edit menu and select Preferences. From there, we choose Send Forms and click on the Company Preferences tab.
Here, we've the option to create and customize multiple email templates for different transaction types. These templates can be used for single transactions, batch emails, and even pay stubs. In addition to customizing the content of the email, we can also personalize the sender, create auto-reply messages, and attach documents as needed.
After making the desired changes, we simply click Save to ensure that our customized email template is ready for use. By understanding the process of editing email templates in QuickBooks, we can streamline our communication and present a professional image to our clients and partners.
Accessing Email Template Settings
Let's talk about how to access the email template settings in QuickBooks.
To locate the email settings, follow these steps:
- Go to the Edit menu and select Preferences.
- Under the Preferences window, look for the Send forms menu.
- Navigate to the Company Preferences tab.
- Here, you can customize the template layout for your emails.
Locate Email Settings
To access the Email Template settings in QuickBooks, navigate to the Edit menu, select Preferences, and then go to the Send Forms tab within the Company Preferences. Once there, you can locate the Email Template settings by following these steps:
- Sign in as an admin or user with permission to edit company preferences in QuickBooks.
- Choose a transaction type from the Email Templates drop-down menu to modify an existing template or select Add Template to create a new one.
- Customize the subject line, body, and use Insert Field to add dynamic data fields in the email template settings.
Save the template and set it as default by selecting OK in the Company Preferences tab.
Verify the changes by sending a test email using the modified or newly created template.
Customize Template Layout
Navigating from the Email Template settings to customizing the template layout in QuickBooks involves accessing the 'Add Template' option and tailoring the subject line, message body, and dynamic data fields.
In QuickBooks Desktop, we can edit company emails, send forms, and select a transaction type to manage community communications effectively.
When customizing the template, it's crucial to create and customize the subject line and message body to reflect the desired tone and branding. Additionally, the 'Insert Field' feature allows for the inclusion of dynamic data, personalizing each email.
Once the changes are made, saving the template and setting it as the default option, if needed, ensures that the customized layout is consistently applied.
This level of customization helps maintain a professional and uniform appearance across all communications.
Creating Custom Email Templates
When creating custom email templates in QuickBooks, we can personalize the subject line and email body to tailor communications to our recipients. Here's how to do it:
- Sign in to QuickBooks as an admin or a user with permission to edit company preferences.
- Follow the steps to create multiple templates for each transaction type.
- Customize the subject line and body of the email template.
- Use the Insert Field option to add dynamic data fields in the email.
- Set a template as default in the Company Preferences tab of the Send forms menu.
Modifying Email Template Content
Modifying email template content involves customizing the subject line and body, utilizing dynamic data fields, and setting the template as default if desired. When customizing the email template, it's important to ensure that the subject line and body convey the intended message clearly and effectively. QuickBooks provides the option to insert dynamic data fields, such as recipient names or invoice details, to personalize the emails sent to customers. Additionally, after customizing the template, it can be saved and set as the default option for future use.
To emphasize the importance of customizing email templates effectively, consider the following comparison:
Aspect | Importance |
---|---|
Clear Subject Line | Ensures recipients understand the email's purpose |
Personalized Body | Adds a personal touch to the communication |
Dynamic Data Fields | Increases relevance and customization |
Default Template | Streamlines the email process for future use |
Customization | Reflects professionalism and brand identity |
Customizing Sender Information
To customize sender information for email templates in QuickBooks, follow these steps:
- Access the Send forms menu and select Company Preferences.
- Modify the sender details for each template by choosing a transaction type from the Email Templates drop-down menu and clicking Add Template to create a new template.
- Customize the sender's name, email address, and other relevant details to ensure the recipient recognizes the sender.
- Personalize the subject line and email body according to your company's branding and communication style.
- Utilize the Insert Field option to add dynamic data fields, such as recipient names or transaction details, for a more personalized touch.
Using Auto-Reply Email Templates
Using auto-reply email templates allows QuickBooks users to streamline their communication process and promptly acknowledge incoming messages. This feature saves time and ensures that your customers or clients receive immediate confirmation of their transactions.
When using QuickBooks, you can set up auto-reply email templates to be sent automatically in response to specific actions, such as receiving a payment or confirming an order. To utilize auto-reply email templates, navigate to the settings in your QuickBooks account and select the option to manage email templates. From there, you can create new templates or modify existing ones to serve as auto-replies.
Once the templates are set up, QuickBooks will automatically send them out when triggered by the specified actions. Additionally, you can use auto-reply email templates for batch emails, such as sending out invoices or pay stubs to multiple recipients at once. This functionality is particularly useful for maintaining efficient and consistent communication with your customers or clients.
Encrypting Emails in QuickBooks
Encrypting emails in QuickBooks is crucial for protecting sensitive financial information. This added layer of security ensures that communication with clients and vendors remains secure and professional.
We'll cover the basics of email encryption and walk through the steps for setting up encryption in QuickBooks.
Email Encryption Basics
When ensuring the security of your emails in QuickBooks, it's essential to understand the basics of email encryption. QuickBooks offers email encryption as an essential part of its features, ensuring the protection of sensitive information.
Here are some key points to consider about email encryption basics in QuickBooks:
- Encryption helps in securing the content of emails, making it readable only to the intended recipient.
- QuickBooks users can enable email encryption through the settings in the top menu bar of the software.
- It adds an extra layer of security to the communication of financial data and sensitive information.
- Email encryption is an important feature for maintaining compliance with data protection regulations.
- QuickBooks ensures that emails containing sensitive financial data are transmitted securely through encryption.
Understanding these basics will help QuickBooks users make the most of the email encryption feature.
Setting up Encryption
After understanding the basics of email encryption in QuickBooks, the next step is to set up encryption by customizing email templates to ensure secure communication of financial data and sensitive information.
To do this, access the Send Forms menu in QuickBooks and select the Company Preferences tab.
Choose Email as the delivery method default and select a transaction type from the Email Templates drop-down menu.
Then, click on Add Template and customize the email template with a name, subject line, and body.
Utilize the Insert Field feature to add dynamic data fields to the email template for encryption.
Save and set the customized template as default to ensure encrypted emails are used for specific transaction types, such as emails to customers.
Attaching Documents to Email Templates
We can easily attach documents to email templates in QuickBooks by manually typing the fields into the message body or using the Insert Field option to include them. When customizing an email template for a specific transaction type, such as invoices, we have the option to attach relevant documents to the email. Here's how to do it:
- Select a transaction type and navigate to the Email Templates drop-down menu.
- Choose Add Template and customize it by adding a name, subject line, and body.
- Utilize the Insert Field option to add dynamic data fields to the email template, including those related to attaching documents.
Save the customized template and set it as the default if necessary.
To attach documents, manually type the fields into the message body or use the Insert Field option to include them in the email template.
Importing Email Templates
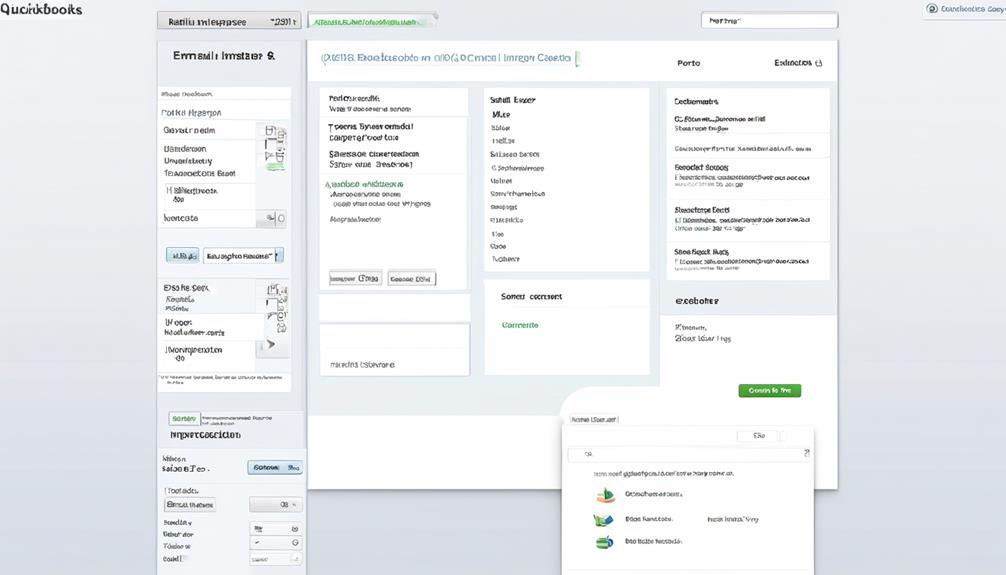
To import an email template in QuickBooks, follow these steps:
- Navigate to the Edit menu.
- Select Preferences.
- Go to the Send forms menu.
- Choose the Company Preferences tab.
- Click on the drop-down menu next to the Template field.
- Select Import.
- Locate the email template file you want to import.
- Click Open.
Importing email templates can save time and help ensure consistency in the emails you send. It allows you to change the default email template to one that better suits your needs or branding. Additionally, you can seek help from the QuickBooks support team if you encounter any issues during the importing process.
After importing the template, you can further customize it to include specific details using the Insert Field option. Once you have made the necessary changes, remember to save the template and click OK in the Company Preferences tab to finalize the importing process.
Deleting Email Templates
When managing our email templates in QuickBooks, it's important to keep our template list tidy and relevant.
Removing unwanted or outdated templates can help streamline our communication processes.
Remove Unwanted Templates
Upon accessing the Edit menu and selecting Preferences, navigate to the Send forms menu and Company Preferences tab to manage the deletion of unwanted email templates in QuickBooks.
To remove unwanted templates, follow these steps:
- Choose the template you want to remove from the list of email templates.
- Select the 'Delete Template' option.
- Confirm the deletion.
- The unwanted template will be removed from the list.
After deleting the template, select OK in the Company Preferences tab to save your changes.
Clear Out Old Templates
Clearing out old templates in QuickBooks can be done by accessing the Edit menu and selecting Preferences, then navigating to the Send forms menu and Company Preferences tab to manage the deletion of unwanted email templates. To delete an old email template, locate the template you want to remove and click Delete. Confirm the deletion to clear out the old email template.
Old Email Templates | Action | Result |
---|---|---|
Unwanted Template 1 | Click Delete | Template Removed |
Unwanted Template 2 | Click Delete | Template Removed |
Unwanted Template 3 | Click Delete | Template Removed |
Navigating the QuickBooks Email Editor
Navigating the QuickBooks Email Editor allows us to customize email templates for various transaction types and personalize the content with dynamic data fields. Here's how to navigate the QuickBooks Email Editor:
- Access the Email Templates in QuickBooks by navigating to the Edit menu and selecting Preferences.
- Create multiple templates for each transaction type by selecting Add Template and customizing the subject line and body.
- Set a template as default by going to the Company Preferences tab of the Send forms menu and selecting Set Default next to the desired template.
- Personalize the email body and subject line using the QuickBooks Email Editor's Insert Field option to add dynamic data fields.
- Import a personalized template in DOCX format to reflect your brand identity and choose it while sending batch emails.
Navigating the QuickBooks Email Editor provides the flexibility to tailor email templates according to specific transaction types and brand preferences, ensuring a professional and personalized communication experience for both businesses and their clients.
Troubleshooting Email Template Issues
When troubleshooting email template issues in QuickBooks, it's crucial to ensure that the correct template is set as default for the specific transaction type, maintaining the professional and personalized communication experience established through navigating the QuickBooks Email Editor.
One common issue to address is ensuring that the template isn't overridden by a different setting for batch emails. To do this, navigate to the Company Preferences tab, and verify if the email preferences are correctly configured for the delivery method and email template.
If using the 'Combine forms to a recipient in one email' feature, and the desired template isn't applied, consider manually composing the email body. Additionally, it's important to consider submitting a feature request to customize email templates when using the 'Combine forms to a recipient in one email' option.
Another aspect to troubleshoot is the subject line; ensure it's appropriately customized to reflect the content of the email.
In case of any further issues, explore the service options subject to the specific email template problem, and utilize the 'Manage' and 'Email Later' features to rectify the situation.
Lastly, consider using the 'insert field' feature to personalize the email content for a more targeted approach.
Best Practices for Email Template Optimization
To enhance the effectiveness of email templates in QuickBooks, consider customizing the content to align with the specific transaction type and recipient, ensuring a personalized and professional communication experience. Here are some best practices for email template optimization:
- Tailor Templates for Different Transaction Types: Customize the email templates for invoices, sales receipts, pay stubs, and other transaction types to provide relevant information to the recipients.
- Personalize Communication for Customers: Utilize customer information to personalize emails, such as addressing them by name and including specific details related to their transactions.
- Save Time with Default Settings: Set default email templates for recurring transactions to save time and ensure consistency in communication with customers.
- Optimize Templates for Mobile Viewing: Ensure that the email templates are optimized for mobile devices, considering the increasing trend of mobile email usage.
- Seek Feedback and Iterate: Regularly seek feedback from recipients and internal stakeholders to refine and improve the effectiveness of the email templates.
Frequently Asked Questions
How Do I Change My Email Settings in Quickbooks?
We can change email settings in QuickBooks by accessing the Edit menu, then Preferences, and selecting Company Preferences.
From there, we can customize the email templates by choosing the transaction type and adding a new template with a personalized subject line and body.
Using the Insert Field feature, we can include dynamic data fields.
After saving the template, we can set it as the default in the Company Preferences tab under Send forms menu.
How Do I Change the Letter Template in Quickbooks?
Sure, we change the letter template in Quickbooks by accessing the 'Customize' option within the specific transaction type.
From there, we can modify the subject line, message body, and set a template as default if needed.
Troubleshooting template issues involves following specific steps outlined by Quickbooks.
These actions allow for personalized and professional communication with clients and vendors.
How Do I Change the Default Template in Quickbooks?
We often find ourselves wanting to personalize our QuickBooks experience, and changing the default template is a common task.
To do this, go to the 'Edit' menu and select 'Preferences.' Then, choose 'Send Forms' and click on the 'Company Preferences' tab.
From there, you can change the default template by selecting a new one from the drop-down menu.
It's a simple process that allows for a more tailored and professional touch.
How Do I Edit a Custom Template in Quickbooks?
We edit custom templates in QuickBooks by following these steps:
- Sign in as an admin or a user with permission to edit company preferences.
- Go to the Edit menu and select Preferences.
- Customize the subject line and body for each template we want to create.
These templates can be used for various purposes such as:
- Emails sent alongside single transactions
- Batch emails
- Pay stubs
If our emails are not using the new template, we can follow the steps to fix email template issues.
Can I Customize Email Templates in Quickbooks for Different Purposes?
Yes, you can easily customize QuickBooks email templates for different purposes. With the quickbooks email template change feature, you can tailor your emails to match the specific needs of your business, whether it’s for sending invoices, payment reminders, or other important communications.
Conclusion
In conclusion, changing email templates in QuickBooks is as simple as customizing a recipe.
By accessing the email template settings and creating custom templates, we can tailor our communication to fit our unique business needs like a bespoke suit.
With the ability to modify content, customize sender information, and troubleshoot any issues, we can ensure that our emails are as polished and professional as a well-crafted piece of jewelry.

Bryn – AI Expert Writer Bryn is the wizard of words and AI at Influenctor. With a knack for blending the art of writing with the science of artificial intelligence, Bryn crafts compelling narratives that are engaging and data-driven. Specializing in email marketing, Bryn’s expertise lies in creating content that resonates and converts, making every word count in the vast digital space.
Email Template
Crafting the Perfect Subcontractor Email Template
Craft a Subcontractor Email Template that will revolutionize your communication with subcontractors and catapult your project to new heights.
Navigating the intricate world of project management, the Subcontractor Email Template serves as a guiding light, leading us through the intricate web of negotiations and agreements. This template is a vital instrument that can either support the triumph of a construction project or result in its downfall.
With the potential to streamline communication and pave the way for a harmonious working relationship between main contractors and subcontractors, this template holds the key to unlocking a world of clarity and efficiency in our collaborative endeavors.
But there’s more to this template than meets the eye – it’s not just about sending emails; it’s about setting the stage for a seamless partnership.
Key Takeaways
- Clear communication is essential for ensuring understanding and avoiding errors or delays in a project.
- The email template serves as a reference point throughout the project, establishing clear expectations and requirements.
- Establishing expectations includes defining the scope of work, establishing timelines, and ensuring accountability for mistakes.
- Maintaining a professional tone and language in the email helps convey respect and professionalism.
Importance of Clear Communication
Clear communication is crucial for successful subcontracting, as it ensures that all parties involved understand expectations and requirements, leading to smoother project execution. When engaging in subcontracting, it’s imperative to establish a formal agreement that outlines the scope of work, timelines, deliverables, and responsibilities. This formal agreement serves as a reference point for all parties involved, providing clarity and minimizing the potential for misunderstandings.
By clearly defining the scope of work, all parties can align their efforts towards achieving the project goals effectively.
Effective communication also plays a vital role in setting clear expectations and requirements. It reduces the likelihood of errors or delays by ensuring that all parties are aware of the specific details and standards to be met. This level of clarity fosters transparency and trust among all parties involved, creating a conducive environment for successful project outcomes.
Additionally, clear communication enables swift conflict resolution and problem-solving, minimizing disruptions to the project timeline and budget. It ensures that all parties are fully aware of their responsibilities and accountabilities, ultimately contributing to the smooth execution of the project.
Key Components of the Email
When ensuring successful subcontracting, effective communication becomes the linchpin for establishing clear expectations and requirements, a principle that carries over into the key components of the email.
In crafting a subcontractor email template, it’s essential to include the following key components:
- Identification of Parties:
Clearly state the names and contact information of both the subcontractor and the main contractor.
- Scope of Work and Payment Details:
Define the specific scope of work, including timelines, deliverables, and any relevant specifications. Additionally, outline the payment details, such as invoicing procedures, payment terms, and any applicable milestones.
Effective communication in subcontracting requires attention to detail and clarity. The email template shouldn’t only convey essential information but also serve as a reference point for both parties throughout the duration of the project.
Establishing Expectations
How can we ensure that the subcontractor’s work aligns with the main contractor’s expectations and requirements?
Establishing clear expectations is crucial to the successful completion of any project. It’s essential to clearly define the scope of work, including any flexibility for variations to prevent disputes.
Timed start and completion dates should be established to allow for adequate margin in the main contractor’s schedule. Additionally, it’s important to ensure that the subcontractor’s standard of work meets or exceeds the requirements outlined in the main contract.
Coordination with other contractors is also vital to avoid delays and ensure smooth project progress. Furthermore, holding the subcontractor responsible for any mistakes that cause liability to the main contractor is essential for accountability.
By establishing these expectations from the outset, we can create a framework for successful collaboration and ensure that the subcontractor’s work aligns with our requirements.
This template can be used as a basis for the email communication in establishing these expectations.
Professional Tone and Language
In our communication with subcontractors, it’s imperative to employ a professional and respectful tone to uphold the standards of competence and courtesy expected in business interactions. When crafting emails or other correspondences, it’s important to:
- Use formal language: Avoid slang, informal language, and jargon to maintain a polished and business-appropriate tone. This ensures that our communication maintains a professional demeanor and upholds the respect due to our subcontractors. It also reflects positively on our organization and conveys a sense of competence and reliability.
- Be clear and concise: Use clear and concise language, avoiding unnecessary verbosity or ambiguity to ensure clarity and professionalism. Clarity in communication helps to prevent misunderstandings and ensures that our messages are effectively conveyed. Conciseness demonstrates respect for the recipient’s time and attention, fostering a positive and efficient working relationship.
Adhering to these guidelines will help to cultivate a professional and respectful tone in our communication with subcontractors, laying a solid foundation for successful collaboration.
Ensuring Timely Responses
As subcontractors, we prioritize prompt and effective responses to emails and inquiries from the main contractor to ensure seamless communication and collaboration. Timely responses are crucial in maintaining transparency and addressing any concerns promptly.
When addressing issues or disputes, we understand the importance of swift action to prevent delays in the project timeline. It’s essential to cooperate with other subcontractors and project stakeholders by responding promptly to coordination requests and scheduling changes. This ensures that the project progresses smoothly and according to plan.
Additionally, timely submission of required documentation, reports, and deliverables as per the agreed-upon schedule is vital to support project milestones. When responding to emails and inquiries, we aim to include all necessary details and provide clear and concise information. We ensure that the tone remains professional and respectful, addressing all parties by their appropriate names and titles.
When it comes to communication, we understand the significance of proactively sending emails and being vigilant about responding promptly to maintain effective collaboration.
Frequently Asked Questions
How Do I Send an Email to a Subcontractor?
We send an email to a subcontractor by clearly defining the scope of work and setting out the terms and conditions of the agreement. It should include identification of both parties, detailed scope of work, work location, and payment details.
Good faith negotiations, sending invoices, understanding the payment process, timing of payment request emails, and sending payment reminders are essential aspects to cover.
In case of non-payment, the email should escalate communication and consider third-party help or legal options.
For international payments, using global payroll software and tips for pitching to construction companies can be included.
How Do You Write an Email Offering Construction Services?
We approach writing an email offering construction services like laying a strong foundation – it’s essential for success.
We clearly outline the parties involved, scope of work, location, payment details, and our commitment to fair negotiations.
Our tone is professional, yet engaging, and we consistently follow up to showcase our value through relevant case studies.
This approach helps us build credibility and establish connections with construction professionals.
What Is a Letter of Intent for a Subcontractor?
We believe a letter of intent for a subcontractor is a crucial document in construction projects. It outlines agreed terms between main contractors and subcontractors and covers essential elements of a construction contract.
The letter of intent includes a detailed scope of works, subcontract price, and payment terms. Key issues that it addresses are outlining the subcontractor’s scope of work, start and completion dates, and ensuring the work meets the main contract’s standards.
How Do You Write an Email Soliciting a Business?
We write an email soliciting a business by starting with a compelling subject line.
Next, we introduce ourselves and our company, providing a brief overview of who we are and what we do.
Following the introduction, we clearly outline the benefits of our product or service. This includes explaining how it solves a specific problem or meets a particular need that the recipient may have.
To encourage a response, we include a call to action in the email. This could involve requesting a meeting, phone call, or further discussion to explore potential opportunities for collaboration.
Finally, we end the email with a polite and professional closing, expressing gratitude for the recipient’s time and consideration.
This approach helps to engage the recipient right from the start and effectively conveys the value proposition of our offering.
Can I Use the Subcontractor Email Template for Magento 2?
Yes, you can use the Subcontractor Email Template for Magento. It is designed specifically for Magento 2 and can help you streamline your subcontractor communication. This template allows you to send professional and customized emails to your subcontractors, saving you time and effort.
Conclusion
In conclusion, with this subcontractor email template, communication between main contractors and subcontractors will surely be crystal clear and without any issues.
It’s not like there’s a shortage of things to worry about on a construction site, so at least this is one less thing to stress about.
Happy subcontracting!
Natali – Editor in Chief (Strategy and Mastery, AI Expert) Natali, our Editor in Chief, is the driving force behind our content’s strategic direction. With a keen eye for detail and a deep understanding of market trends, Natali ensures that our content is top-notch and strategically aligned with our client’s goals. Her expertise in AI helps to seamlessly integrate advanced technology into our marketing strategies, pushing the boundaries of conventional marketing.
Email Template
Effective Change of Email Address Template Guide
Wondering how to smoothly transition to a new email address? This comprehensive template has everything you need to make the change effortless.
We have all experienced times when we are presented with different paths to choose from, each leading in a different direction. The decisions we make in these moments have the potential to greatly impact our future.
When it comes to changing our email address, that sense of transition and potential for new opportunities is palpable. But how do we navigate this change seamlessly, ensuring that our contacts are informed and the transition is smooth?
We have some valuable insights and a comprehensive template to guide you through this process, making the transition as effortless as possible.
Key Takeaways
- Understanding the audience is crucial for tailored communication.
- Clear and concise messaging helps prevent misunderstandings.
- Maintaining a professional tone fosters respect and clarity.
- Personalization techniques enhance meaningful communication.
Audience Identification
Understanding our audience is crucial for crafting tailored and impactful communication that resonates with their needs and preferences. When it comes to the 'Change of Email Address Template', audience identification plays a pivotal role in ensuring that our messaging effectively reaches the right recipients.
By identifying our audience, we gain valuable insights into their demographics, interests, and pain points. This understanding enables us to create content that resonates with them, leading to higher engagement and response rates.
In the context of email address change, knowing our audience allows us to communicate the process of updating their information in a manner that's clear, concise, and relevant to their needs. Moreover, targeting the right audience ensures that our message reaches the people who are most likely to be interested in the information about the change of email address or the process for updating their new email address.
Ultimately, audience identification is crucial for building relationships and loyalty with our audience by delivering personalized and relevant communication that addresses their specific concerns regarding the change of email address.
Clear Message Drafting
As we aim to effectively reach our audience with the 'Change of Email Address Template', mastering the art of clear message drafting becomes paramount. Clear message drafting ensures that our email about the change of address is easily understood and effectively conveys our thoughts. To help you master this skill, we recommend the following:
- Use simple language: Avoid jargon and complex sentences to make the email easy to understand for all recipients.
- Structure your message: Organize the information logically, starting with the most important details about the change of email address.
- Avoid ambiguity: Be clear and concise in your wording to prevent any misunderstandings regarding the change of address.
- Make it scannable: Use bullet points or numbered lists to make important points stand out and allow for easy comprehension.
Professional Tone Maintenance
Maintaining a professional tone in all communications is essential for fostering respect and clarity in our interactions. When informing others about an email change, it's crucial to uphold a professional demeanor. Please update your records with our new email address: [NewEmailAddress@company.com].
By using Professional Tone Maintenance, we ensure that our message is conveyed with the utmost professionalism and respect. It also helps in maintaining a consistent and professional image across all forms of communication.
When addressing matters related to personal or employee-related issues, it's important to uphold a respectful and professional tone to convey the message effectively. Professional Tone Maintenance templates provide a structured and organized format for all communication needs, ensuring that our communications are clear and concise.
This approach not only fosters a professional work environment but also helps in upholding a level of professionalism in all our interactions. Using Professional Tone Maintenance is crucial for upholding a consistent and professional image, and it ensures that our communications are respectful and maintain a high level of professionalism.
Personalization Techniques
We can enhance our communication by implementing personalized techniques that cater to individual preferences and needs. Personalization adds a personal touch to our messages, making them more meaningful and effective. Here are four techniques for achieving this:
- Customized Order Options: Utilize customized order options for personalized letters, ensuring that each message is tailored to the recipient's specific needs and interests.
- Variety of Templates: Use a variety of love letter templates for personalization, allowing for a range of emotions and expressions to be conveyed based on the recipient and the context of the message.
- Employee Communication: Maintain effective communication with returning employees by covering various personal matters related to them, such as acknowledging their achievements or addressing any concerns they may have.
- Professional Time Off Requests: When requesting time off, use templates to ensure a professional and formal way to request time off, while also promoting a healthy work-life balance for employees.
Review and Sending Process
Making the shift to the review and sending process, we can ensure that our personalized communication maintains its effectiveness and professionalism. This process is crucial as it involves checking the content and details of the email before hitting the 'Send' button.
By carefully reviewing the subject line, body content, attachments, and recipient list, we guarantee that the email is accurate, error-free, and aligns with company standards. This meticulous review not only enhances the quality of our communication but also fosters a sense of reliability and attention to detail. It's imperative to double-check the email to maintain consistency and professionalism in all our correspondence.
Once the review process is completed, we proceed with sending the email to the intended recipients. While this may seem like a routine step, it's essential to ensure that the email is sent from the correct email account and that all recipients are accurate. This final stage of the process marks the culmination of our efforts to deliver precise and polished communication.
Frequently Asked Questions
How Do You Announce an Email Address Change?
We announce an email address change by sending a clear and concise notification to our contacts.
It's essential to provide necessary information and express gratitude for their understanding.
We must also ensure that important contacts are notified and update the email address on all platforms.
Additionally, we should inform personal and professional contacts, update our email address on social media profiles, and check automated email subscriptions or services.
How Do I Write a Letter to Change My Email Address?
We write a letter to change our email address for the following reasons:
- Clearly stating the reason for the change
- Providing the new email address
- Expressing gratitude for understanding
- Encouraging recipients to update their contact information
It's important to maintain a positive tone throughout the letter and include a polite closing. We always ensure that the recipients have all the necessary information to continue correspondence seamlessly.
Dear [Recipient's Name],
I hope this email finds you well. I am writing to inform you that I will be changing my email address. The reason for this change is [state reason].
Please update your contact information with my new email address: [new email address]. This change will be effective from [date].
I would like to express my gratitude for your understanding and cooperation during this transition. I understand that updating contact information can be an inconvenience, and I appreciate your willingness to make this change.
To ensure that we can continue our correspondence seamlessly, I kindly request that you update your records with my new email address as soon as possible. This will help avoid any disruptions in communication.
Thank you once again for your understanding and cooperation. If you have any questions or need further information, please do not hesitate to contact me at my new email address.
Best regards,
[Your Name]
How Do I Notify Contacts of Change of Email Address?
We notify contacts of a change of email address by sending a clear and concise email. We provide the new email address and any relevant details, and we thank recipients for their understanding.
It's important to update our email address on social media profiles and check for any automated email subscriptions or services. This ensures everyone has our updated contact information.
How Do You Inform Customers of Address Change?
We inform customers of an address change by crafting a clear and concise email notification.
It's crucial to communicate the change effectively to avoid any confusion or missed communications.
Our aim is to ensure that our customers seamlessly transition to the new email address without any disruptions.
We take this responsibility seriously, and our proactive approach is key to maintaining strong relationships with our valued customers.
Conclusion
As we embrace change and adapt to new email addresses, we also embrace the opportunity to stay connected and informed.
Just as our email addresses evolve, so do we. Embracing change allows us to grow, learn, and connect in new and exciting ways.
Let's continue to stay open to change and the possibilities it brings.
Natali – Editor in Chief (Strategy and Mastery, AI Expert) Natali, our Editor in Chief, is the driving force behind our content’s strategic direction. With a keen eye for detail and a deep understanding of market trends, Natali ensures that our content is top-notch and strategically aligned with our client’s goals. Her expertise in AI helps to seamlessly integrate advanced technology into our marketing strategies, pushing the boundaries of conventional marketing.
Email Template
Mastering Magento Email Templates: Tips & Tricks
Harness the power of Magento 2 Email Template to revolutionize your email marketing strategy and elevate customer engagement to new heights.
A well-designed email template can have a major impact on how customers interact with and perceive a brand.
But what if I told you there’s a way to take your email communication to the next level? Magento 2 Email Template offers a range of customizable options that allow us to tailor our emails to reflect our brand’s identity and deliver a more personalized experience to our customers.
From theme-based customizations to dynamic data integration, the possibilities are endless.
But how exactly can we leverage these features to enhance our email marketing strategy and drive better results?
Let’s explore the world of Magento 2 Email Template and uncover its potential for elevating our customer communications.
Key Takeaways
- Theme-based customizations allow developers to override email templates and tailor the design to align with the website’s branding and styling.
- Admin-based customizations provide a straightforward way to customize default transactional emails by choosing a base template and customizing the content, subject, and styles.
- Customizing email templates and configuring store email addresses within the templates ensure a consistent and professional appearance and ensure that customers receive communications from recognizable sources.
- Utilizing dynamic data and variables in email templates enhances customization and personalization, allowing for a tailored and engaging experience for customers.
Theme-based Customizations
In theme-based customizations, developers can override email templates by creating templates in a new directory within their custom theme. This pattern follows the structure of theme_dir/ModuleVendorName_ModuleName/email.
By customizing email templates within the custom theme, developers have the flexibility to tailor the email design to align with the overall branding and styling of the website. This customization process involves using HTML and CSS to modify the appearance of the email templates. Additionally, custom variables can be utilized to introduce dynamic content into the email templates, providing personalized information to the recipients.
Creating custom email templates within the custom theme allows for a seamless integration of the email design with the website’s theme, ensuring a cohesive and consistent brand experience for customers. Furthermore, the customization of email templates in the custom theme empowers developers to maintain control over the visual presentation and layout of the emails, leveraging the full potential of CSS for styling and layout adjustments.
With the ability to customize email templates within the custom theme, developers can create compelling and visually captivating emails that effectively communicate with the recipients.
Admin-based Customizations
Admin-based customizations in Magento 2 provide a straightforward way to customize the default transactional emails. Here’s how to do it:
- Accessing Admin-based Customizations:
- Go to MARKETING > Communications > Email Templates in the Admin panel to access admin-based customizations.
- Customizing Email Templates:
- Choose a default template as a base and customize the content, subject, and styles to suit your requirements.
- Configuring Customized Templates:
- After customizing the template, configure it to be used in the Sales Emails section of the Configuration to ensure that the new, customized email templates are used for transactional emails.
Email Content Customization
To refine the customization of email content in Magento 2, we build upon the foundation established through admin-based customizations, ensuring a seamless transition to tailoring the email templates to meet specific needs and branding requirements.
When creating a new email template or editing an existing one in Magento 2, it’s essential to consider the template content and HTML tags used. Custom templates and configuration play a significant role in achieving the desired look and feel for email communications.
Email template contains various elements, including dynamic data and system variables, which can be leveraged to personalize the content for individual recipients.
Additionally, inline CSS is crucial for ensuring consistent rendering across different email clients. By applying inline styles using tools such as the Emogrifier library, the presentation of the email template can be optimized for a professional appearance.
It’s also important to configure store email addresses within the templates to ensure that customers receive communications from recognizable and appropriate sources.
Monitoring and analyzing the performance of customized email templates can provide valuable insights for further tailoring messages to different customer groups, ultimately enhancing the effectiveness of email communications.
Email Styles and Organization
How can we effectively structure and organize the email styles to ensure visual appeal and adaptability across various platforms in Magento 2?
When creating email templates in Magento 2, it’s crucial to pay attention to the organization and styling to ensure a visually appealing and consistent experience for recipients. Here’s how we can achieve this:
- Utilize standard system fonts: Incorporating standard system fonts in the email template layout ensures a consistent and professional appearance across different devices and email clients.
- Implement responsive design principles: By adopting responsive design principles, we can ensure that the email templates adapt seamlessly to various screen sizes, enhancing the user experience for recipients accessing emails on different devices.
- Optimize image sizes: Optimizing image sizes within the email templates is essential for faster loading and improved visual appeal, especially on mobile devices with slower internet connections.
Dynamic Data and Variables
Dynamic data and variables significantly enhance the customization and personalization of email content for improved customer engagement. In Magento 2 email templates, variables can be used to include store and sales related information, such as the Name and Sender Email.
These templates are treated as physical files and can be customized to meet specific requirements. To add a variable to the email template, one can simply click the ‘Insert Variable’ button and select from a list of default variables or create a new custom variable.
The Sender Name and Sender Email can also be dynamically populated using variables, ensuring that each email is personalized and tailored to the recipient. By leveraging dynamic data and variables, the content of Magento 2 email templates can be personalized with store-specific details, order information, and other relevant data, providing a tailored and engaging experience for customers.
This level of customization is crucial for building strong customer relationships and driving sales through targeted and relevant communication.
Frequently Asked Questions
How to Setup Email Templates in Magento 2?
Setting up email templates involves creating theme-based customizations in a new directory within the custom theme or using admin-based customizations through the Admin panel.
We configure the template in the Sales Emails section of the Configuration and customize the header and footer templates using theme or admin methods.
Customizing email content with system and template-specific variables and applying inline styles for email clients ensures the templates are tailored to our needs.
How Do I Change My Magento 2 Email Template?
To change the Magento 2 email template, follow these steps:
- Navigate to the Admin panel.
- Access MARKETING > Communications > Email Templates.
- Select the template you wish to modify.
- Make the necessary changes to the template.
- Ensure that any customizations align with the overall design and branding strategy.
- Save the changes.
- Test the new template to ensure it renders correctly across different email clients.
How Do I Send a Custom Email in Magento 2?
We send custom emails in Magento 2 by following these steps:
- Creating a new email template in the admin panel or by customizing the theme-based template.
- Utilizing the built-in email functionality in Magento to send the custom email.
- Programmatically triggering the sending of the custom email using Magento’s email API.
By following this process, we are able to personalize and tailor our email communications to meet specific business needs.
Where Are Email Templates Stored in Magento 2?
Email templates in Magento 2 are stored in the module_dir/view/area/email directory.
It’s essential to know this to efficiently manage them.
Conclusion
In conclusion, Magento 2 Email Template offers powerful customization options for creating personalized and professional email communications. Businesses that personalize their email content see a 14% increase in click-through rates.
With theme-based and admin-based customizations, as well as dynamic data integration, businesses can create impactful email templates that enhance customer engagement and brand perception.
It’s an essential tool for optimizing email marketing strategies and improving overall customer experience.
Natali – Editor in Chief (Strategy and Mastery, AI Expert) Natali, our Editor in Chief, is the driving force behind our content’s strategic direction. With a keen eye for detail and a deep understanding of market trends, Natali ensures that our content is top-notch and strategically aligned with our client’s goals. Her expertise in AI helps to seamlessly integrate advanced technology into our marketing strategies, pushing the boundaries of conventional marketing.
-
Email Marketing1 month ago
The Convergence of Email and Chat: Integrating Messaging Platforms in Your Strategy
-
Email Marketing1 month ago
Hyper-Personalization: Using Big Data to Create 1:1 Email Experiences
-
Email Marketing2 months ago
Predictive Analytics in Email Marketing: Anticipating Subscriber Behavior
-
Email Marketing2 months ago
The Psychology of Color in Email Templates: Choosing the Right Palette
-
Email Marketing3 months ago
How to Set Up a Dedicated IP for Your Email Campaigns
-
Email Marketing3 months ago
Mobile-Optimized Emails: Technical Best Practices for Responsive Design
-
Email Marketing2 months ago
Storytelling in Email Marketing: Crafting Compelling Narratives
-
Email Marketing2 months ago
How to Create ADA-Compliant Email Templates