Email Marketing Tools and Techniques
Mailchimp How to Create a Template
Navigating the intricacies of Mailchimp's template creation process can be daunting, but the key to captivating emails lies within—discover the secrets within.

Designing an engaging and unified email template in Mailchimp is both a demanding and fulfilling task. It involves choosing the right layout and paying close attention to the minute details. This process requires a keen eye for detail and a creative touch.
As we explore the intricacies of Mailchimp's template creation process, we'll uncover the essential steps to ensure your emails stand out in crowded inboxes and entice recipients to engage with your content.
Join us as we unravel the art of crafting impactful email templates that resonate with your audience and elevate your email marketing game.
Key Takeaways
- Consider your plan and available template options
- Use drag-and-drop editing to customize the template
- Understand the distinction between the new and classic creators
- Preview the template on desktop and mobile devices before finalizing
Choosing the Right Layout
When choosing the right layout for your Mailchimp template, consider your plan and the available template options to make an informed choice. Familiarize yourself with the different template options available and read about them to help make a decision.
Understanding the image requirements for content blocks is crucial in choosing the right layout for your needs. Whether it's a saved template, a Mailchimp template, or a custom-coded option, it's essential to choose a template based on your needs and save it with a name.
Keep in mind that changes to custom-coded templates may impact existing campaigns, so consider this when choosing a layout.
The new builder allows for a drag and drop design, making it easier to customize and create the desired layout for your email. It's important to consider the design and functionality that best suits your content and goals.
Customizing Images and Text

Customizing images and text in your Mailchimp template is a straightforward process using the drag-and-drop editor to effortlessly add and format content.
Here's how to do it:
- Drag-and-Drop Editing: Use the drag-and-drop editor to easily add and format text and images in your template. This intuitive feature allows for seamless customization without the need for coding or advanced technical skills.
- Direct Text Modification: Modify text and styles by typing directly into the content block editing pane and applying styles using the editor toolbar. This allows for quick and precise adjustments to the text within your email templates.
- Customizable Content Blocks: Customize the look and feel of your template by adding, deleting, moving, and replicating content blocks. Utilize these customizable content blocks to easily rearrange and create a unique layout for your email design.
Saving and Using Your Template
To save and use your Mailchimp template, it's important to understand the distinction between the new and classic creators and how it impacts the process.
When saving and using your template, it's crucial to be aware of the template language and any limitations when using a template created in the new creator.
If you encounter any issues, the help articles can be accessed for assistance.
When creating your template, consider the types of email you want to design, such as Regular Email or Automated Email, and ensure compatibility of single-column emails between the classic and new creators when saving and using your template.
Additionally, familiarize yourself with the template options available, including the use of content blocks to customize your template.
If you need to change the default creator when saving and using your template, you can easily do so by accessing your account settings and making the necessary adjustments.
Designing With the Classic Builder
With the classic builder in Mailchimp, users can select from a variety of template categories to begin designing, providing flexibility and control over the layout and design of their emails. When designing with the classic builder, it's important to understand the differences and functionalities between the new and classic builders.
To get started, choose a template category such as Layouts, Themes, or Code your own. Familiarize yourself with the drag-and-drop template to add and format text, images, and other content. This allows for easy customization and personalization.
Additionally, consider creating a custom-coded template for more design control using Mailchimp's template language. This is ideal for users who want to create a unique and branded email design.
Once the design is complete, it's crucial to save the template with a name for future use. Finally, before sending the email, it's recommended to test the email to ensure that the design appears as intended across different devices and email clients.
Testing and Previewing Your Template
When testing and previewing your Mailchimp template, it's essential to modify the design and view it to ensure it appears correctly on both desktop and mobile devices. After making the necessary adjustments, it's important to check the template on different devices to ensure a seamless viewing experience for all recipients. Below is a guide to help you navigate the testing and previewing process:
| Action | Description |
|---|---|
| Log in to Mailchimp | Access your account and navigate to the Templates page to find your saved templates. |
| Modify the Template | Make any necessary changes to the template using the Classic Builder or the new creator. |
| Preview on Desktop | Use the preview feature to see how the template appears on a desktop screen. |
| Preview on Mobile | Similarly, preview the template on a mobile device to ensure it is optimized for smaller screens. |
| Seek Support | If you encounter any issues during the testing process, you can contact Support for assistance. |
If you need further guidance on testing and previewing your Mailchimp template, you can check out Mailchimp's Email Template help article or explore different template options to find the best fit for your campaign. Remember, you can also copy and paste elements from one template to another or create entirely new ones to suit your needs.
Frequently Asked Questions
How Do I Create a Mailchimp Template?
We can create a Mailchimp template by following these steps:
- Log into our account.
- Click on the 'Campaigns' tab.
- Select 'Email Templates.'
- Choose to create a template from scratch or use a pre-designed layout.
- Customize the template with our branding and content.
- Save it for future use.
This simple process allows us to create professional-looking emails for our marketing campaigns.
How Do I Create a Custom Email Template?
Creating a custom email template is a breeze with Mailchimp. We can unleash our creativity by using the new builder's filters, saved templates, or custom code.
For more design control, we can dive into the classic builder or even go the extra mile with custom-coded templates.
The possibilities are endless, and with Mailchimp's user-friendly interface, we'll be crafting stunning custom email templates in no time.
Can You Upload Your Own Template to Mailchimp?
Yes, we can upload our own template to Mailchimp. This allows for a more customized design.
Before uploading, ensure the template meets Mailchimp's image requirements for content blocks.
Custom-coded templates offer more design control and dynamic features.
After uploading, we can modify and preview the template and test it across various clients and devices.
Mailchimp provides technical support for paid users and resources for troubleshooting and customization.
Can You Edit Mailchimp Templates?
Yes, we can edit Mailchimp templates. This allows us to customize the design and content using filters, saved templates, or even code our own.
We've the flexibility to create custom-coded templates for more design control using Mailchimp's template language or by importing HTML.
After creating and modifying a template, we can save it with a specific name and use it to create new emails in the future.
It's important to preview and test changes to ensure compatibility with different devices and email clients.
Can I Use a Custom Template for Inserting a Table in Mailchimp?
Yes, you can use a custom template for inserting a table in Mailchimp. Simply follow the inserting table in Mailchimp instructions to add a table to your custom template. This will help you create professional and visually appealing emails for your subscribers.
Conclusion
In conclusion, creating a template in Mailchimp is like building a house. You start with a strong foundation, customize the layout and design, and then save it for future use.
With the right tools and resources, you can easily bring your vision to life and create stunning email templates that reflect your brand.
So, get started and watch your email marketing efforts soar to new heights!
Natali – Editor in Chief (Strategy and Mastery, AI Expert) Natali, our Editor in Chief, is the driving force behind our content’s strategic direction. With a keen eye for detail and a deep understanding of market trends, Natali ensures that our content is top-notch and strategically aligned with our client’s goals. Her expertise in AI helps to seamlessly integrate advanced technology into our marketing strategies, pushing the boundaries of conventional marketing.
Email Marketing Tools and Techniques
In Mailchimp What Does Cleaned Mean
At first glance, the term 'Cleaned' in Mailchimp seems simple, but its impact on your email marketing might surprise you.
We’ve all experienced this – carefully designing the ideal email campaign, only to discover that a large number of our contacts are listed as ‘Cleaned’ in Mailchimp.
Did you know that, on average, 20.5% of email addresses in a typical list decay each year? The term 'Cleaned' might seem straightforward, but the implications and reasons behind it are often overlooked.
Understanding why contacts get 'Cleaned' in Mailchimp and the impact it has on your email marketing efforts is crucial for maintaining a healthy subscriber list and maximizing your campaign's effectiveness.
So, what exactly does 'Cleaned' mean in Mailchimp, and how can you ensure it doesn't hinder your marketing goals?
Key Takeaways
- Cleaned contacts in Mailchimp are those that have experienced hard bounces or repeated soft bounces, indicating potential deliverability issues.
- Regularly reviewing and addressing cleaned contacts is crucial for maintaining sender reputation and maximizing marketing effectiveness.
- Contacts can be labeled as cleaned due to reasons such as incorrect or fake email addresses, unregistered email domains, or server refusal.
- Managing cleaned contacts involves removing contacts with hard bounces and monitoring and addressing contacts with repeated soft bounces, while also utilizing data management tools to cleanse and update the contact list.
Understanding 'Cleaned' Contacts in Mailchimp
Understanding 'Cleaned' Contacts in Mailchimp helps maintain sender reputation and prevent deliverability issues by identifying contacts with delivery problems. Cleaned contacts are those that have experienced hard bounces, indicating permanent delivery failures, or repeated soft bounces, signifying temporary delivery issues.
Mailchimp designates these contacts as 'cleaned' to enforce email marketing best practices and uphold sender reputation. It's vital to monitor and manage cleaned contacts as they can impact the success of marketing campaigns.
High bounce rates, whether from hard or soft bounces, can pose significant challenges to email deliverability and sender reputation. By regularly reviewing and addressing cleaned contacts, businesses can uphold the effectiveness of their marketing efforts.
Additionally, ensuring compliance with privacy policies and promptly removing unsubscribed contacts and invalid email addresses can contribute to maintaining a clean and deliverable contact list. Utilizing tools like Insycle can further aid in cleansing and standardizing Mailchimp data, ultimately reducing bounces and enhancing the precision of marketing campaigns.
Reasons for Contacts Being 'Cleaned' in Mailchimp
When a contact is labeled as 'Cleaned' in Mailchimp, it signifies that the last email sent to that address resulted in a hard bounce or there were repeated soft bounces in succession. A hard bounce happens when an email can't be delivered to the intended address permanently, often due to reasons like an incorrect or fake email address, an unregistered email domain, or a server refusing to accept the emails.
Mailchimp marks an email as 'cleaned' to enforce best practices for handling bounced emails and maintain a good email sender reputation. It's crucial to keep the bounce rate below 2% to avoid deliverability issues and harm to the email sender reputation.
In a Mailchimp account, contacts may be cleaned due to several reasons, such as non-subscribed contacts, outdated email lists, or invalid email addresses. To maintain a clean email sender reputation and ensure successful email marketing campaigns, it's essential to regularly clean and update the email list. This process involves removing non-subscribed contacts, identifying and correcting invalid email addresses, and managing bounces effectively.
Impact of 'Cleaned' Contacts on Mailchimp Charges
The presence of 'cleaned' contacts in Mailchimp doesn't impact the charges associated with the email marketing activities. Mailchimp's pricing structure is primarily based on the number of subscribed contacts and not on the presence of 'cleaned' contacts. Charges are designed to align with the number of subscribed contacts and the level of features or services used, rather than the total number of contacts, including those marked as 'cleaned.'
In Mailchimp, 'cleaned' contacts are email addresses that have generated hard bounces or repeated soft bounces. These contacts are flagged as 'cleaned' to prevent further sending of emails to addresses that are consistently bouncing. However, this designation doesn't affect the pricing structure. Whether a contact is marked as 'cleaned' or not, it doesn't impact the cost of using Mailchimp for email campaigns.
Understanding the impact of 'cleaned' contacts on Mailchimp charges is essential for effectively managing contacts in Mailchimp. It allows users to focus on maintaining a healthy email list and optimizing their email marketing efforts without having to worry about additional charges based on 'cleaned' contacts.
Managing 'Cleaned' Contacts in Mailchimp
How do 'cleaned' contacts in Mailchimp affect email deliverability and sender reputation?
When a contact is marked as ‘Cleaned' in Mailchimp, it means that the email sent to that contact has bounced due to reasons such as the email being too large or the recipient's inbox being full. This can impact email deliverability and sender reputation as Mailchimp marks contacts as ‘cleaned' to maintain best practices and uphold sender reputation.
To manage ‘cleaned' contacts in Mailchimp, it's crucial to ensure that the contact list is regularly cleansed and updated. This involves removing contacts with a history of hard bounces, as these indicate permanent delivery failures, and monitoring and addressing those with repeated soft bounces, which are temporary.
Additionally, using data management tools like Insycle can help cleanse, declutter, and standardize Mailchimp data, reducing bounces and maintaining a clean email sender reputation.
Ultimately, managing ‘cleaned' contacts in Mailchimp requires vigilance and proactive maintenance to ensure optimal email deliverability and sender reputation.
Preventing 'Cleaned' Contacts in Mailchimp
To prevent 'cleaned' contacts in Mailchimp, regularly monitoring and promptly addressing bounce issues is essential. Here are some key strategies to help prevent contacts from being marked as 'cleaned':
- Understand the difference between hard and soft bounces to take appropriate action when an email bounces multiple times.
- Maintain a clean and accurate email list to ensure a low bounce rate and a positive email sender reputation.
- Utilize Insycle to cleanse and standardize Mailchimp data, reducing the likelihood of contacts being marked as 'cleaned'.
- Purge garbage data from your Mailchimp database to keep it clean and optimize email marketing efforts.
Frequently Asked Questions
What Does It Mean if a Contact Is Cleaned in Mailchimp?
If a contact is cleaned in Mailchimp, it means their email address has either hard bounced or experienced multiple soft bounces. This status is crucial for maintaining a good sender reputation and ensuring deliverability.
We must keep the bounce rate below 2% to avoid issues.
Insycle can help cleanse Mailchimp data to reduce soft and hard bounces, improve personalization, and maintain a clean sender reputation, ensuring the effectiveness of email marketing efforts.
What Does It Mean for an Email to Be Cleaned?
In Mailchimp, when an email is marked as 'cleaned,' it means that the last email sent to that address hard bounced or there have been repeated soft bounces. This is important to maintain a good sender reputation and deliverability.
It's crucial to keep the bounce rate below 2% to avoid issues.
Insycle can help cleanse Mailchimp data to reduce bounces and maintain a clean email sender reputation.
How Do I Fix a Cleaned Email in Mailchimp?
To fix a cleaned email in Mailchimp, we need to address the underlying issue that caused it to be marked as cleaned.
This could involve updating the email address, resolving delivery issues, or re-engaging with the contact.
It's crucial to maintain a healthy email list to ensure optimal deliverability.
Regularly reviewing and updating contact information, along with following best practices for email marketing, can help prevent emails from being marked as cleaned in the future.
How Do I Remove Cleaned Contacts From Mailchimp Audience?
To remove cleaned contacts from Mailchimp audience, follow these steps:
- Go to the Audience section.
- Select the specific audience you want to work with.
- Go to the Manage Contacts dropdown.
- Choose 'View Contacts' and filter for cleaned contacts.
- Select all cleaned contacts.
- Click 'Actions' and then 'Remove.'
- Confirm the removal.
Regularly cleaning contacts has several benefits:
- It ensures a healthy email sender reputation.
- It improves campaign performance.
- It helps maintain an organized and engaged audience in Mailchimp.
Conclusion
In conclusion, it's crucial to understand the implications of 'cleaned' contacts in Mailchimp. By managing and preventing 'cleaned' contacts, we can maintain a good sender reputation and avoid deliverability issues.
Remember, an ounce of prevention is worth a pound of cure. Keep your email list clean and your bounce rate low to ensure successful email campaigns.
Natali – Editor in Chief (Strategy and Mastery, AI Expert) Natali, our Editor in Chief, is the driving force behind our content’s strategic direction. With a keen eye for detail and a deep understanding of market trends, Natali ensures that our content is top-notch and strategically aligned with our client’s goals. Her expertise in AI helps to seamlessly integrate advanced technology into our marketing strategies, pushing the boundaries of conventional marketing.
Email Marketing Tools and Techniques
How to Make Mailchimp Popup in WordPress
Simplify the process of creating a Mailchimp popup in WordPress and see a significant boost in subscriber numbers – find out how!

Have you ever considered the best way to gather potential customer contacts on your WordPress site through Mailchimp?
It’s often said that implementing a Mailchimp popup can significantly boost subscriber numbers, but the process can seem daunting.
We’ve recently discovered a straightforward method to create a Mailchimp popup in WordPress that is not only easy to set up but also customizable to fit your specific branding and messaging needs.
Join us as we explore the step-by-step process of making a Mailchimp popup in WordPress, including customizing the form, generating the necessary code, and seamlessly integrating it into your website.
You won’t want to miss the potential this simple yet powerful tool holds for expanding your subscriber base.
Key Takeaways
- Setting up a Mailchimp account is the first step in creating a popup form in WordPress.
- Customizing the popup form to match the branding of the website is important for a cohesive user experience.
- Using a time delay for the popup form can be effective in capturing visitors’ attention at the right moment.
- Integrating Mailchimp with WordPress can be done using a plugin, which allows for easy management of the popup form and customization options.
Setting up Mailchimp Account
To set up your Mailchimp account, we’ll begin by navigating to the Mailchimp website and clicking on the ‘Sign Up’ button.
Once on the site, you can easily create signup forms using Mailchimp’s form builder. Mailchimp offers various types of forms, including the Pop-Up Signup Form, Embedded Signup Form, and more. These forms can be customized to match your site’s branding and can be set to appear automatically for visitors.
After signing up for a Mailchimp account, you can start building your email list and creating your audience. Mailchimp provides a pop-up form builder that allows you to design and customize how the pop-up will appear on your site. By using the pop-up form, you can control when and how the pop-up appears to your visitors, making it less intrusive.
Additionally, Mailchimp allows you to automatically create signup forms for your audience, making the process of collecting email addresses seamless.
Once your Mailchimp account is set up, you’ll be ready to integrate the signup forms into your website and start growing your email list.
Creating the Popup Form

When creating the Mailchimp popup form, consider using a time delay to ensure it appears at an opportune moment for visitors. Adding a time delay before the pop-up form appears can help prevent it from interrupting the user experience.
In WordPress, Mailchimp provides an easy way to embed subscriber pop-up forms on your website. To create the pop-up form, go to the Mailchimp dashboard, navigate to the ‘Audience’ tab, and select ‘Signup Forms’. Then, choose the ‘Subscriber pop-up’ form type and customize it to match your website’s branding. You can also set the time delay for when the pop-up form should appear, ensuring it doesn’t immediately disrupt the visitor’s browsing experience.
Additionally, the design, form fields, and trigger settings can be personalized to help maximize the effectiveness of the pop-up form. By creating and customizing a Mailchimp pop-up form with a time delay, you can help ensure that it provides value to visitors and encourages them to subscribe without being intrusive.
Generating Popup Code
Using a suitable plugin or Mailchimp blocks, the pop-up code can be easily generated for your website.
To make a Mailchimp pop-up form, start by logging into your Mailchimp account and navigating to the ‘Audience’ tab. Then, click on ‘Signup forms’ and select ‘Subscriber pop-up’.
Next, customize the form fields and design to ensure the pop-up signup form works best for your website. Mailchimp provides a guide to help you edit the form and tailor it to your specific needs.
Once you’re satisfied with the design and settings, Mailchimp will generate the code for your pop-up form. For websites with plugin support, the Insert Headers and Footers plugin is recommended to embed the signup form code into the website’s head section.
If your website doesn’t support plugins, Mailchimp blocks can be used to incorporate the pop-up form. Remember to set the pop-up to appear after a certain time, as recommended, and utilize the help articles provided by Mailchimp for further assistance in generating and customizing the pop-up code.
Adding Code to WordPress

After generating the code for your Mailchimp pop-up form, the next step is to seamlessly add it to your WordPress website using a suitable plugin or Mailchimp blocks.
When adding the code to WordPress, consider the following steps:
- Utilize a WordPress Plugin: Look for a reliable WordPress plugin that supports Mailchimp integration. Install and activate the plugin, then follow the plugin’s instructions to connect your site to Mailchimp and add the pop-up signup form.
- Use Mailchimp Blocks: If your website doesn’t support plugins, you can utilize Mailchimp blocks to add the pop-up form. Simply navigate to the Integrations page on Mailchimp, connect your site, and use the Mailchimp block to add the embedded signup form directly within your WordPress editor.
- Customize the Appearance: After adding the pop-up form, ensure it appears at the desired time to enhance user experience. Additionally, customize the form’s appearance and behavior directly within Mailchimp without the need to edit the code again.
Customizing Popup Display
To customize the popup display, adjust the timing and frequency to ensure it appears after a specific period, rather than immediately. This allows the audience to engage with your website before the popup appears, increasing the likelihood of subscription. In addition, customizing the form design and content, including fonts, colors, and layout, is essential for aligning with your website’s branding and capturing the audience’s attention. Utilize triggers such as scrolling, exit intent, or specific actions to control when the popup form displays, ensuring it appears at the most opportune moments. Implement A/B testing to optimize the performance of the popup form, enabling you to determine the most effective design and messaging for your audience. Lastly, utilize analytics tools to track the effectiveness of the popup form and make data-driven decisions for continuous improvements.
Customizing Popup Display Adjust timing and frequency Customize form design and content Utilize triggers Implement A/B testing Utilize analytics tools
Frequently Asked Questions
How Do I Add a Mailchimp Pop-Up to My WordPress Site?
We can add a Mailchimp pop-up to our WordPress site by using a plugin like OptinMonster or Sumo, which allows for easy integration and customization.
We should also consider using Formidable Forms to enhance the pop-up forms with powerful customization options and subscriber segmentation.
Additionally, it’s important to configure the pop-up to appear after a certain time to improve the user experience.
How Do I Create a Mailchimp Popup?
We create a Mailchimp popup by following these steps:
- Access our Mailchimp account and navigate to the Audience dashboard.
- Select the Signup forms and choose the Form builder option.
- Customize the popup’s design and settings to fit our website’s branding and user experience needs.
- Save the changes.
- Embed the popup code into our WordPress site to make it live.
Why Is My Mailchimp Popup Not Showing WordPress?
Well, turns out our Mailchimp popup wasn’t showing on WordPress because we’d the site set to private or Coming Soon mode. Once we fixed that, it displayed just fine.
Also, we learned to set the popup to appear after a certain time, not immediately, for better user experience.
Plus, we made sure our browser’s cookie storage wasn’t preventing repeated displays.
Now it’s working like a charm!
How Do I Embed a Mailchimp Newsletter in WordPress?
We embed a Mailchimp newsletter in WordPress by utilizing the Mailchimp block.
First, we ensure the website supports plugins or use the Mailchimp block for non-plugin sites.
Then, we customize the pop-up to appear after a specific time. This enhances the signup form’s design and functionality, ensuring seamless integration with our website and compatibility with third-party platforms.
This approach captures visitor attention, encourages email sign-ups, and drives conversions effectively.
Conclusion
So, there you have it! By following these simple steps, we’ve successfully set up a Mailchimp popup on our WordPress site.
Now, whenever visitors come to our website, they’ll be greeted with a stylish and effective popup form that will help us capture more leads and grow our email list.
With Mailchimp, it’s easy to create eye-catching popups that will engage our audience and drive more conversions.
Let’s watch our email list grow!
Natali – Editor in Chief (Strategy and Mastery, AI Expert) Natali, our Editor in Chief, is the driving force behind our content’s strategic direction. With a keen eye for detail and a deep understanding of market trends, Natali ensures that our content is top-notch and strategically aligned with our client’s goals. Her expertise in AI helps to seamlessly integrate advanced technology into our marketing strategies, pushing the boundaries of conventional marketing.
Email Marketing Tools and Techniques
How to Add a Calendar Invite to Mailchimp
Discover the game-changing method of adding calendar invites to Mailchimp emails that will boost event attendance and customer engagement.

Are you prepared to elevate your Mailchimp email campaigns by incorporating calendar invites? Let’s explore how you can smoothly add calendar invitations to your Mailchimp emails.
It’s a game-changer for boosting event attendance and increasing customer engagement. But how exactly do you go about doing this? Stick around to learn the step-by-step process of adding a calendar invite to Mailchimp and discover the benefits it can bring to your email marketing strategy.
Key Takeaways
- Locating the event link in Google Calendar and Outlook involves accessing the event, clicking on ‘Edit event’, and selecting ‘Publish Event’ to find the event link.
- In Outlook, the event link can be found by clicking on the Settings gear icon, selecting ‘View all Outlook settings’, navigating to the Calendar section, and clicking on Shared Calendars to find the event link.
- Creating a calendar event link in Mailchimp requires navigating to the Content section of the campaign builder, using a Text content block to insert and highlight the event URL, and clicking the link icon in the toolbar to ensure the link supports http, https, and ICS files.
- Connecting AddEvent Calendar Links in Mailchimp involves creating an AddEvent account, installing the AddEvent Calendar Links app, accessing the event in Google Calendar or Outlook, copying the event URL, and inserting it within the Mailchimp email content by highlighting the URL and using the link icon.
Locate Event Link in Google Calendar
Locating the event link in Google Calendar is a straightforward process. First, access the event and click on ‘Edit event.’ Then, reveal the URL by selecting ‘Publish Event’ from the options.
Once the event is open for editing, click on the three vertical dots and select ‘Publish Event.’ This will display the URL in the ‘Link to Event’ field.
This link can then be easily added to emails or platforms like Mailchimp for sharing upcoming events seamlessly. Understanding how to locate event links in Google Calendar is essential for effective communication and promotion of events.
By mastering this process, users can efficiently add events and share event links with their audience. Furthermore, this knowledge can be extended to other platforms and integrations, such as syncing Calendly invitees with Mailchimp and utilizing the AddEvent Calendar Links integration in the new email builder.
Ultimately, mastering the process of locating event links in Google Calendar empowers users to streamline their event promotion and communication efforts.
Locate Event Link in Outlook

After mastering the process of locating event links in Google Calendar, it’s important to understand how to find the event link in Outlook for seamless integration with Mailchimp and effective event promotion.
To locate the event link in Outlook, we need to follow these steps:
- Click on the Settings gear icon.
- Select ‘View all Outlook settings.’
- Navigate to the Calendar section.
- Click on Shared Calendars to find the event link.
Once in the Shared Calendars section, we can copy the URL from the ‘Can view all details’ section. This URL can then be used to create a calendar event link to add to your Mailchimp email using the instructions provided.
Remember to test the links before sending the campaign and customize the appearance of the add-to-calendar links in your email for a seamless user experience. Accessing email and chat support within your Mailchimp account can also be helpful if you encounter any issues during this process.
Create a Calendar Event Link
To create a calendar event link within Mailchimp, follow these steps:
- Navigate to the Content section of the campaign builder and select ‘Edit Design.’
- Using a Text content block, insert and highlight the event URL copied from the calendar.
- Click the link icon in the toolbar.
When adding the event link, make sure it supports the http and https protocols, as well as ICS (iCalendar) files to ensure compatibility within the campaign.
For Google Calendar, the event link can be found by following these steps:
- Click on the event in Google Calendar.
- Select ‘Edit event.’
- Click the three vertical dots.
- Choose ‘Publish Event’ to copy the URL from the ‘Link to Event’ field.
In the case of Outlook, locate the event link by following these steps:
- Click on the Settings gear icon in Outlook.
- Select ‘View all Outlook settings.’
- Click ‘Calendar.’
- Choose ‘Shared Calendars’ to copy the URL from the ‘Can view all details’ section.
Creating an event link allows recipients to seamlessly add the event to their calendar, maximizing engagement and attendance. By following these steps, you can effectively incorporate calendar event links into your marketing emails using Mailchimp’s new email builder.
Connect AddEvent Calendar Links
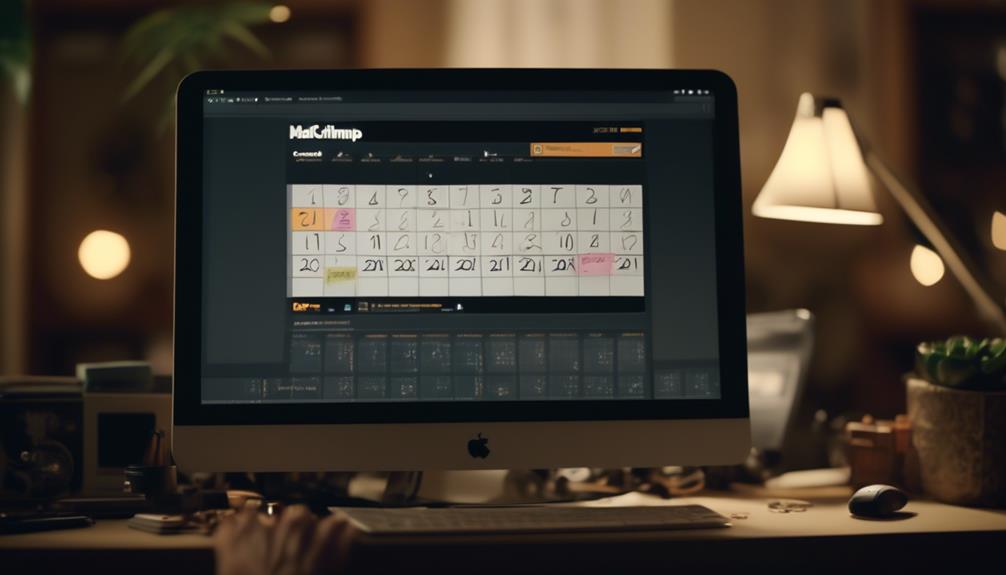
Incorporating AddEvent Calendar Links into Mailchimp campaigns enhances the ease and efficiency of adding events to recipients’ calendars, strengthening engagement and maximizing attendance.
To connect AddEvent Calendar Links, start by creating an AddEvent account and installing the AddEvent Calendar Links app. Once installed, finding the information you need is easy.
For Google Calendar, simply click on the event, select ‘Edit event’, and then ‘Publish Event’ to copy the URL from the ‘Link to Event’ field.
For Outlook, click on the Settings gear icon, select ‘View all Outlook settings’, then ‘Calendar’, and finally ‘Shared Calendars’ to copy the URL from the ‘Can view all details’ section.
After obtaining the event link, you can easily insert it within your Mailchimp email content. Edit the design, insert the event URL, highlight it, click the link icon, choose the web address, enter the click-through link, and click ‘Insert’.
By incorporating AddEvent Calendar Links, you keep your audience informed about upcoming Calendar Events, and ultimately boost attendance.
If you encounter any issues, contact Support to resolve them and ensure a seamless process.
Disconnect AddEvent Calendar Links
Upon disconnecting AddEvent Calendar Links, users can access the Apps section in Mailchimp to select the Disconnect option for AddEvent Calendar Links.
When disconnecting the AddEvent Calendar Links, any information previously added using the app will remain in the content block until it’s manually removed.
It’s important to familiarize yourself with the different content block types in the new email builder and understand content performance in campaign reports to optimize your email campaigns effectively.
Additionally, paid users can easily find technical assistance and guidance by accessing email and chat support. If you need further help, Mailchimp provides a range of help articles to assist with any questions or concerns.
Furthermore, to provide feedback or suggestions for improvement, users can submit their feedback through the provided options, ensuring that their input is heard and considered for future updates.
Disconnecting AddEvent Calendar Links is an easy process that allows users to manage their account and create impactful email campaigns with the new email builder.
Frequently Asked Questions
Can You Add a Calendar Invite to Mailchimp Email?
Yes, we can add a calendar invite to a Mailchimp email. By inserting a calendar event link from Google Calendar or Outlook into the email content, recipients can easily add the event to their calendars.
This enhances engagement, boosts event attendance, and improves the overall user experience. We’ll guide you through the process, ensuring your audience can effortlessly stay informed and organized.
Does Mailchimp Have a Calendar Feature?
Yes, Mailchimp has a calendar feature.
It allows users to create and customize add-to-calendar links in their emails using the AddEvent Calendar Links integration.
This feature enables us to share events and calendars with our audience and provides testing and customization options for the links.
Additionally, Mailchimp offers resources such as video tutorials and support teams for assistance with using add-to-calendar links in our emails.
How Do I Embed a Calendar Invite?
We embed a calendar invite in Mailchimp by following these steps:
- Create event links in Google Calendar or Outlook.
- Add the event link to a Mailchimp campaign.
- In the campaign builder, edit the design.
- Insert the event URL and highlight it.
- Click the link icon in the toolbar.
- Choose Web address.
- Enter the click-through link.
Is There a Way to Add a Calendar Invite to an Email?
Yes, there’s a way to add a calendar invite to an email.
You can create a calendar event link by editing the campaign, inserting the event URL, and customizing the appearance and functionality of the link before sending the campaign. This allows recipients to easily add the event to their calendar.
Additionally, for assistance, you can sync Calendly with Mailchimp or use the AddEvent Calendar Links integration in the new email builder for further support.
Conclusion
In conclusion, adding calendar invites to your Mailchimp emails is a simple way to increase engagement and event attendance.
By providing a convenient way for customers to add events to their calendars, you can make it easier for them to stay connected with your brand.
So, don’t miss out on this opportunity to boost interaction with your audience and make sure your events are on their radar.
It’s like giving them a front row seat to all your happenings.
Natali – Editor in Chief (Strategy and Mastery, AI Expert) Natali, our Editor in Chief, is the driving force behind our content’s strategic direction. With a keen eye for detail and a deep understanding of market trends, Natali ensures that our content is top-notch and strategically aligned with our client’s goals. Her expertise in AI helps to seamlessly integrate advanced technology into our marketing strategies, pushing the boundaries of conventional marketing.
-

 Email Automation4 weeks ago
Automated Email Marketing 101: A Beginner's Tutorial
-

 Email Warmup1 month ago
Warm Follow-Up Email
-

 Email Design Hub2 months ago
3 Essential Tools for Email Marketing Design Success
-

 Email Marketing4 weeks ago
What Is Email Marketing Advantages and Disadvantages
-

 Email Marketing1 month ago
Why Email Marketing Is Effective
-

 Email Template4 weeks ago
Crafting the Perfect Book Club Invitation Email Template
-
 Search Engine Optimization4 weeks ago
SEO Checklist: Enhance Your Site’s Performance
-

 Email Marketing1 month ago
Does Email Marketing Work in 2024


